Wednesday 29 February 2012

Installing a wood stove into a bell tent or yurt


Fitting instructions for Belltent flue kit.

  • Secure round steel flashing plates onto either side of flue hole, Sandwiching the canvas between. (We recommend once fitted these plates are left in situ)

  • For a waterproof seal add a bead of silicone between outer edge of exterior plate and canvas.

  • Assemble base and back plates using fixings provided. (All the smaller bolts are for steel plates. Longer bolts are for clamps)

  • Add green clamp to back side of back plate.

  • Connect 500mm pipe to stove using pin and push in small length of fire rope between flue and collar of stove to seal.

  • Position stove and plates inside tent and push the 500mm length through the flue hole.

  • Go outside and add on 90 degree elbow and one length of pipe using locking bands to secure.

  • Position flue stand and add in one length and secure using clamp and two small guys.

  • When secure attach remaining length and rain cap.

  • Use other guys from rain cap if required.

Thursday 23 February 2012

Installing a small wood burning stove into a cabin

The kit for installing a small stove into a cabin is very similar to that for a shepherds hut. The realistic budget for installing a small wood stove is £750. This will buy the stove (£400) and the flue (£350)
Follow the link below to see my cabin stove in action

Deep in the woods on the banks of the Exe is a small cabin with a Hobbit stove installed. The Hobbit is finished in emerald green and black and is on a Hobbit stand.


Shepherds hut stove

Step 1.
Position your hearth and fix with a contact adhesive.
Position the stove onto the hearth in the exact finishing spot. ( Mark the position of the feet with a pencil mark) You can then use a plumb line from the interior of the roof to the center of the flue outlet. This will give you the center point for the hole to be cut into the roof. The diameter of this hole will depend on the flue size. Dermot used a twin walled insulated flue to penetrate the roof with an external diameter of 150mm.
Step 2.
Attach the flashing to the external roof surface using self tapping screws and bond the edge with a silicone sealant. The flashing used here was a Dekite 204.
Step 3.
Position the twin wall components and secure with a wall support. There should be approx.. 200mm of twin wall below the level of the interior roof if combustible.
Step 4.
Attach the adaptor and measure the amount of single skin pipe required to go between the collar of the stove and the base of the adaptor. Remembering that each section of flue must run internally into the next. I would suggest setting all the flue up, in a dry run, before finally fire cementing the flue components together.
Step 5.
With all the components running inside one another it easier to locate the collar of the stove onto the base of the flue system before attaching the collar to the stove. This is not an issue when using the 90 degree T and cap component and fitting the flue to the rear of the stove.
Step 6.
Position any shielding material to the sides of the stove, where applicable.
Step 7.
Allow all the fire cement seals to dry naturally for at least 24hrs before your first fire.
Fitting stoves into boats is very similar so please follow this link for more info

Found this picture of what looks like a windysmithy model installed in a Hollow Ash shepherds hut.
They look like they are great huts.
http://www.hollowash.co.uk/Gallery/Pages/HAH_-_Interior_Gallery.html#2

I also found some really interesting information on the history of stoves in shepherds huts at the great website Anatomy of a shepherds hut.
http://www.shepherdhuts.co.uk/page4.htm

Here is another stove installed in a shepherds hut by Blackdown Shepherds huts
http://blackdownshepherdhuts.co.uk/shepherd-hut-gallery-1.htm

This shepherds hut has a small range installed but uses the same single to twin wall flue system
http://www.theyorkshirehutcompany.com/gallery.html#!prettyPhoto[gallery]/2/

For more information on the history of shepherds huts I found this website very intertesting
http://www.shepherd-hut.co.uk/history.htm

Wednesday 22 February 2012

Installing a wood burning stove into a shepherds hut


Shepherds Hut Stove Installation
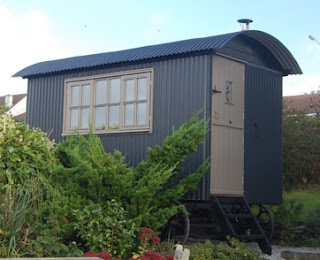
The increasing popularity of shepherds huts has seen a huge rise in the number of styles and material choices available from a host of makers. They range in price, for a new or second hand one from £7000 to £20000!  Whichever hut you have, the only thing that really makes your hut a ‘home from home’ is having a wood stove fitted. Having a stove will allow you to use your hut all year round, so if you are hiring it out for the ‘glamping’ market, it will soon pay for itself! This blog is about the flue parts needed, the stoves available and a step by step guide on how to install a small wood burning stove into your shepherds hut.
The flue components you require can be summarized as follows;
1 x 1000mm length single skin flue
1 x 500mm length single skin flue
1 x Adaptor single to twin wall flue pipe
1 x 500mm twin wall flue
1 x rain cap
1 x flashing /storm collar
1 x cover plate
1 x support bracket
firecement
( you may also require locking bands/joint clips depending on the flue system manufacturer selected)
Flue components can be sourced from Salamander Stoves
Installing a ‘Hobbit’ stove into Dermot’s hand built shepherd hut
Tucked away in the green folds of the Devon countryside, Dermot constructed his first shepherds hut. From an old set of wheels, Dermot then built a chassis and hut from a mixture of new and reclaimed materials. To heat the hut he then set about installing a ‘Hobbit’ stove from Salamander Stoves. This little  4kw stove was the perfect size for Dermots larger sized hut. The stove was mounted on a slate hearth in the corner of the hut. Steel shielding was added around the stove into the corner. The flue was mounted at the rear of the stove using a 90degree T and cap. This liberated the entire stove top which can then be used for cooking